ANTARCTICA ANTARCTICA
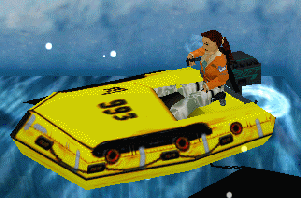
1. On this level the water zaps Lara's health quickly in a short dunk. On left side of block run jump to left
ice berg, run jump on right to ledge across, head past hut on left to channel, run jump over channel to
other side. Head right climb up on ledge at end jump to next ledge on left, at edge turn slightly right run
jump to ledge around corner, run jump to ice bridge. Head right jump up to next flat surface then jump to
passage collect Lg. Medi. pack, Flares, Rockets and Life crystal exit same way you entered the area. Back
at channel ledge follow path around to right, at edge jump forward swim to other side climb out on ledge.
On left jump forward swim to other side climb out on next ledge across in front of ship. Head around to
right climb up on ledge, climb up to next ledge, on left climb up to higher ledge, turn around facing ship
jump grab monkey climb above, climb across to other side drop down to ledge below on left run jump to
front of ship.
2. Head to middle of deck drop through hole, on left hang right down ramp at bottom shoot Badguy, head around to right enter Machinery room. Straight ahead on right shoot another Badguy, climb upon ledge pull lever opens trap door behind you on floor, Shoot Badguy drop down through hole shoot another Badguy. Continue forward hang left down hall way up ramp shoot Badguy at top, push switch opens door behind you enter through. On left is a switch on right are 2 passages a hole up above in ceiling, head down passage shoot Badguy drop down through hole on floor, hang left to grate shoot Badguy collect his UZI clips. Climb up to ledge above looking out bay window you can see the bottom of your boat, push switch drops boat to water below. Head back to where you entered this area, climb up through ceiling hole follow ledge around to left then right, push switch opens door beside you enter through door to back of ship. Hang right around ship at end on left jump grab to ledge drop down on other side to Secret #1 collect MP5 clips and Life crystal return back to ship. At the rear jump off ship landing in water swim to boat climb in.
3. Head right around ship enter channel on left beside hut, inside channel pull over by ledge climb out on left. On right climb up ladder (you might want to use a Flare in this area) at top slide down jump grab to ledge above to crawl space. Crawl around to right to Secret #2 collect Lg. Medi. pack crawl back in crawl space head left then right then another right at end drop down in water swim to boat climb in. Drive it just past ledge dive in water at bottom collect Flares return back to boat, continue down channel hang left pull up in front of water gates along shore on right climb out shoot Badguy.
4. Head around the left side of building climb up on block jump grab monkey swing above, head forward to almost end hang left then right another right then left swing right drop down at end slide down on left shoot Badguy. Head around to left then right and right again, in this area is a raised structure enter the area shoot dog. Straight ahead enter door in green building follow passage to almost end shoot dog, at end on left shoot Badguy collect his Desert Eagle clips, Continue forward exit on right to new area with a fuel tank ahead and green building on left, push switch on building go underneath fuel tank collect Shotgun shells. At end of building drop down through hole where pipe is headed, jump in water swim under middle ledge to other side climb out on ledge.
5. On right jump up to ledge above head left checking fuel pump gauges collect Life crystal at end climb up ladder to top. Turn around on right is the Generator room that's sealed, head through door around to left enter cave hang right follow path down ramp turn right you'll come to area with fenced in dogs for now. Straight ahead follow fence around to left then right shoot Badguy at other end of passage hang right you'll see a bridge, on right side of it shoot dog below, turn around hang drop grab climb down wall into pit behind box collect Grenades. Return back up above cross bridge follow path back to fuel tank area, head back around building to right past hole straight ahead enter cave hang right on left shoot 2 dogs. In this area is a large building with 2 sets of slamming doors that hurts you on contact, enter through doors timing your moves just right.
6. At the end hang left then another left in room shoot 2 Badguys on right get their Sm Medi. pack follow room around to right then left. Enter office area on left, push switch on right opens door behind you, in right corner collect Sm. Medi. pack exit room. Head left through door collect Crowbar on ledge, on right shoot Badguy get his Shotgun shells exit back out building beware of slamming doors shoot Badguy behind last door. Head back through cave around building enter dark passage at the end back to raised structure area. On right straight ahead climb up ladder at top pull lever opens trap door on roof behind door, use crowbar on door (don't leave crowbar laying around) enter through door.
7. At edge jump grab monkey climb above climb across drop down on roof hang right across bridge hang another right cross another bridge collect Sm. Medi. pack. Return back to roof drop down through trap door, above the 2 file cabinets study the map it's the settings for the fuel gauges, red, green, red, green. On the other side of room on right pull lever opens door beside you shoot Badguy collect his Sm. Medi. pack head back to fuel gauges set gauges by turning the wheel. Now head back to Generator room enter through door pull lever on far wall starts generator to supply the area with power. Now head back to fenced in dogs push switch on fence release first dog shoot him enter fence push another switch on fence to right shoot next 2 dogs, enter through next fence push switch on left opens door beside you. Enter hang left to another office shoot dog on right in alcove beside desk collect UZI gun and clips head to next desk collect Gate Control Key on ledge behind desk, shoot Badguy head back to monkey climb back where you left the boat.
8. Past the boat at the door of building use crowbar, inside use Gate Control Key in lock in middle box on wall, push switch raises door behind water gates shoot Badguy. Head back to boat climb in drive straight ahead on left side of gates enter through newly opened door on left. Follow channel to ledge with flag back up boat along ledge climb out shoot Badguy, up ahead collect UZI clips return to boat, climb out on other side swim through alcove collect Hut Key return back to boat. Continue driving around bend climb out on ledge collect Shotgun shells return to boat. Head back out channel to Hut around ship climb out on ice berg ledge in water, run jump to ledge across head to Hut use Hut Key in lock shoot dog enter Hut to Secret #3 collect Life crystal, UZI clips and Flares. Return back through channel past water gates through second channel on left, at end climb out on ledge climb up next ledge, on left climb up to next ledge shoot Badguy follow path around to left then right, at edge shoot Badguy on right head past Badguy around cabin to the front.

RX-TECH MINES ANTARCTICA
1. In this level you'll run across Flame Throwers, don't shoot them they'll help you along the way. Watch
out for inhuman Mutants with their poisonous lethal breath, they can only breath on you when their
standing. On right jump grab up to crawl space enter through hang left 5 times, then back track till you
come to a closed door with a passage on left to another crawl space. Continue forward till you come to
hole in floor, hang drop grab climb down wall drop to bottom. Behind you on other side of gate are 2
Mutants and a Flame Thrower, collect Desert Eagle clips on left push switch on right, enter through door
on right drop down to bottom head left then left again. On right drop down climb up on other side to Mine
Cart Terminal and Control room area.
2. Head right past catwalk heading up to catwalk going down, at bottom straight ahead climb up on ledge shoot Mutant on other side. Return back up to top this time go to catwalk heading up, at top enter Control room push switch on left turns on lights. Head around to left jump upon ledge turn around shoot another Mutant. On outside of entrance jump climb up to roof, straight ahead side step left till ceiling points higher up, hang drop grab shimmy left to almost end. Climb down ladder where Lara's feet hang then bring her up once, back flip grab to crawl space behind you crawl in to Secret #1, on right collect Grenades and Sm. Medi. pack. Return back to entrance hang drop down to ground, head back up catwalk past catwalk leading up to catwalk heading straight across, walk across at end on right is you first cart ride so climb in.
3. Lean and use your brake when needed. Ride past first pit jump, on left you can see a secret, around 2 small curves, down 2 ramps, at second ramp put the brake on a little lean left going around third curve don't brake too much there's another pit jump around curve. After pit jump get ready to hit track switch cart will come to a stop climb out. Head through passage crawl under drills to other side, straight ahead hang left jump up to ledge on right with black wall, jump grab up to crawl space inside on right hang drop to bottom collect Sm. Medi. pack exit back out. Head to other side to slide down hole, at bottom turn around backwards slide down grab at end shimmy left once drop down landing on slanted ledge. Turn around walk inside alcove by dark area shoot a different kind and tougher Mutant, walk around slanted ledge at edge hang drop to bottom. Head left at end walk off edge backwards slide down slider grab end drop to ledge below. On left climb up through crawl space on other side hang drop down shoot Mutant.Return back through crawl space hang drop grab edge shimmy left drop grab next ledge shimmy right drop to ledge below shoot Mutant. Jump grab to next crevice shimmy left till your able to climb up, on left enter passage to new area shoot Mutant.
4. Head left to catwalk jump grab climb up collect crowbar jump back down to ground. On right is a crawl space high up in wall head that way, shoot Mutants then head around to the right jump grab climb up on ledge. On left run jump grab to edge of wall shimmy left to passage, crawl through at end push switch opens door back at secret 1, return back to ground. Retrace steps back a top catwalk turn facing beam, on left run jump to ice hill, run jump to ice hill on right, then run jump to another ice hill on right. Enter passage on left climb up wall drop on left side crawl under drills to end. On left are Machinery with spiked wheels, run around the first one, on right climb up ladder drop on left to second Machinery area. Time your run under third Machinery retrace steps past the next, at end climb up to ledge. Straight ahead on left jump grab up to next ledge, jump climb up to another ledge on left till you reach the top, on right jump shoot Mutant climb up on ledge. At end hang drop down to bottom follow tracks back to cart collect Life crystal climb back into cart. Head around 2 curves, up long ramp, pit jump put brake on hit track switch, head around another curve, pit jump, as your going up ramp duck 3 obstacles, brake around curve returning back to Terminal climb out cart head back to ledge.
5. Head right use crowbar on door enter through collect Lead Acid Battery, return back up to Control room retrace steps back to secret 1 enter through door to Secret # 2, drop down to ledge head down ramp at bottom shoot Mutant. On left jump up to ledge cross tracks collect Desert Eagle clips, MP5 clips and Life crystal return to Terminal to bottom cart on right climb in ready for another crazy ride. Head up the ramp duck 2 obstacles hit track switch, around curve, down ramp duck 2 more obstacles, pit jump duck 2 more obstacles, around curve cart comes to a stop climb out. Turn around enter passage across platform push switch on left enter through door hang right at end, then another right, slide down ramp to bottom entering steamy area (you might want to use a flare in this area). Hang left to almost end on right shoot Mutant enter passage hang right another right then left to crawl space on right. Enter through hang right collect Shotgun shells, around corner collect Rockets and Sm. Medi. pack return back through crawl space shoot Mutant on right head that way. At end hang right enter other side of steamy area behind gate. On left climb up ladder drop down on left push switch enter through door, at end on right crawl up ramp drop down on other side to new area.
6. Head toward door straight ahead, shoot Mutant when he enters through door, on left side of door collect Desert Eagle clips exit through door hang left. Straight ahead on left walk down ramp to edge of water, straight ahead just below is niche in water, swim down to it collect Desert Eagle clips and Flares return back up to ledge climb out. Turn around jump to the left back in water at bottom collect Winch Starter, return back up to ledge climb back out. Head back inside building push switch on left shoot Mutant enter passage, at end push another switch enter through jump over break on ledge enter through door on left back to cart. On left of cart run jump across collect Life crystal return to cart climb in for the ride back to Terminal. Head around curve duck obstacle, around another curve up ramp duck obstacle hit track switch, head around curve up ramp collect Life crystal, down ramp back at Terminal climb out.
7. Head up to Control room climb into cart for the last wild ride. Head up ramp, around curve down ramp, pit jump, up ramp duck 2 obstacles and 2 drills, at end cart will come to a stop in new area with crane climb out. Walk to left of tracks, on left jump upon ledge collect Flares return to tracks. Jump to platform in water with crane use Lead Acid Battery in black hole on side of crane, climb up top crane at rear use Winch Starter, lowers pod further down in water. Return to bottom platform hang left then left again at edge in water look for dark area with 1 light, jump in water swim down to it enter passage on right climb out on ledge on right health up. Jump back into water swim down underneath pod up through hole climb out inside pod collect Lg. Medi. pack health up. Now find the ledge to look for a dark area with 2 lights, jump back into water swim down between lights enter passage, hang 2 rights climb out on ledge collect Lg. Medi. pack health up. Jump back into water hang right then up through tunnel climb out at end on ledge to new area collect Sm. Medi. pack.
8. Straight ahead on right climb up on ledge, around to left is a Flame Thrower, follow path to corner climb up on ledge. Head to bridge cross over shoot Mutant on left then right. On left edge in middle of bridge hang drop to ledge below then hang drop down to another ledge. Turn around run jump across to next ledge, on left jump climb up in alcove collect Grenades. Back on ledge on left run jump over to next ledge, turn around on right corner run jump to next ledge, on left edge run jump to next ledge. Turn around run jump to last ledge hang right through passage to Secret #3, at end hang right then another right collect Lg. Medi. pack, Desert Eagle clips and Grenades. Retrace steps back a top bridge. Head left to structure push switch enter through door to other side of room.
LOST CITY OF TIMMOS ANTARCTICA
1. Watch out for those stinging Bees in this level, but sometimes they can be helpful. Straight ahead
through door hang left to ladder on right climb up to top. At end of passage hang right then 2 more rights
pull lever opens door below. Retrace steps back down ladder turn around enter passage straight ahead on
left. Inside collect ULI Key retrace steps back up ladder to lever hang left then right. At edge run jump to
pillar then run jump grab to ledge across, collect Life crystal and Rocket Launcher, hang drop from white
area to ground. Head around to right past water to almost doors, on left use ULI Key in lock enter through
door, on left climb up ladder drop down on left then hang left then left again, drop down at edge to ledge
below. Pull lever on left shows area with 5 switches, return back inside building. Straight ahead on right
slide down ramp to bottom, hang right drop down at end across the room in left corner pull lever, raises
ladder in another area and opens big doors. Exit through big doors back past water to other side of area to
left corner enter through another door. Straight ahead on right climb up ladder push first 2 switches, then
push last switch opens gates below, climb back down ladder enter through gate.
2. Straight ahead hang left, on right is a broken bridge, as you start crossing Bees attack on right, so head straight at end on left run jump grab to ledge across run forward flip around shoot Bee collect Life crystal. Walk forward just a little shoot another Bee on right. On left run jump up to ledge, at edge straight ahead jump grab ledge above climb up, turn right on right edge run jump grab to ledge across. Climb up turn right shoot Bees as they attack you from their nest, also see invisible ledges as their green light shines on them. Run jump on invisible ledge, walk to other side jump to corner of bridge top, then jump over to other corner of bridge top. Turn left jump to next invisible ledge walk to end, run jump to Bees nest to Secret #1 collect Sm. Medi. pack and Desert Eagle clips return back across both invisible ledges. Straight ahead hang drop at edge to other side of bridge. At bottom turn around head to other end of bridge on left in alcove collect Sm. Medi. pack, head to other side enter passage.
3. Head around to left, at end on right is another bridge, as you cross over it shoot 2 bad Mutants coming down the stairs, by jumping from side to side. Head up the stairs time your run past 2 swinging pots of coals, continue around to the left under low ceiling, turn around draw the Bees out under the low ceiling shoot them. Follow same passage to right, enter another passage around to left then right to a gate, pull lever on right enter into room shoot Mutant that exit door straight ahead by jumping from side to side. Repeat same steps with door on right then left, enter left gate pull lever on right opens crawl space up above. Head to rock pillar climb up on ledge run jump grab ledge above hang right, on left crawl through to other side to new area.
4. In this room are 2 swinging pots of hot coals and many levers to pull, you have to manipulate the levers to raise certain platforms to open doors below. On left hang drop to walkway below, straight ahead is a timed lever to a secret save that one for last. Turn around at the end on right run jump to blue ledge, then jump to next ledge, on right climb up to top at the edge jump grab to ledge above. Crawl through crawl space on left pull lever at end lowers blue ledge on right, exit out run jump to ledge with swinging pot crawl through crawl space on right collect UZI clips and Flares, exit back out return back to ledge across. On left edge run jump to next ledge across crawl through crawl space pull lever raises 2 blue ledges on right, exit back out run jump back to ledge across. Drop down 3 times turn around run jump to blue ledge then run jump to brown ledge below. At the end on right hang drop to ledge below then drop down on left, shoot Bees head around to left pull lever raises blue ledge above you. Retrace steps back up to first blue ledge turn around stand jump to blue ledge across pull lever drop down raises blue ledge behind you. Return back up to ledge above pull first lever again raises blue ledge on right again, exit out drop down on right to bottom ledge, jump to ledge on left take one step back stand jump forward landing on blue ledge below. Turn around jump grab to monkey swing above climb across drop down at end pull lever raises blue ledge on left behind you plus opens doors on right. Head out jump to blue ledge on left turn around jump grab walkway above climb up, on right climb up on block head to lever save your game here.
5. It's time for the timed secret lever, you have a long ways to travel so sprint run when you can and avoid the Bees, here we go. Pull lever flip around run to end hang left drop down on blue ledge hang drop to ground, sprint run through exit doors hang right sprint run across room hanging to the left enter through door climb up ladder on right. Drop down on left run to pull lever on right wall enter through door, hang right into beam ray in middle of room. Stay to the right head up the stairs straight across through door down stairs, hang right straight ahead drop down hang left timing your run past 2 swinging pots of coals to the other end of the bridge. Drop down on right edge to ledge below, keep dropping till you reach bottom head right jump over hole enter through door to Secret #2, collect Life crystal, Desert Eagle clips and Lg. Medi. pack, pull lever twice exit out retrace your steps back up to bridge. Head past swinging pots back up stairs shoot Bees enter through door around on right to Quicksand area.
6. At end of passage walk through quicksand along right wall, follow around till your able to climb out on right. Climb up step on left then jump up on ledge on left slide down to flat surface, turn left jump to sloped ledge jump back and fourth inching your way to other side to flat surface. Jump grab to ledge above enter drop down on other side collect Sm. Medi. pack pull lever on right opens way to secret, retrace steps back out to passage. Head left climb up on ledge hang left straight ahead climb up on ledge shoot Bee on right, head left follow passage at the end climb up on ledge collect first Oceanic Mask. The place starts shaking the ceiling starts falling down in front of you, be patient and walk back to exit and don't let any boulders fall down on you. At the exit you'll notice everything has changed, on the last step run jump to ledge across, take 2 steps forward angle right stand jump to sloped ledge around corner, at the end on edge stand jump without smacking your head to ledge across, continue in passage so boulders don't get you. In passage on right jump grab to ladder climb down head left, at end climb up on ledge the shaking stops, hang left then right slide down slider, At bottom crawl past swinging pot to the right collect Desert Eagle clips, crawl back past pot to the right stand run past the second swinging pot. Pull lever on right opens timed door above ladder, climb up ladder at top wait till door closes then head left through gate back in room with beam ray shoot Bees. Head to block that's facing the gate of Quicksand area insert first Oceanic Mask, the block turns showing a statue. Head back up stairs then down the stairs. straight ahead in the middle of the room is a block, push it toward the wall, on the right side push it again, shoot Bee climb up on block jump grab ladder on right climb up to Secret #3. Straight ahead time your run past swinging pot to crawl space, inside collect Life crystal and Lg. Medi. pack. Retrace your steps back out up the stairs across walkway toward beam, jump to walkway on left enter passage to Wind area.
7. In this area you'll run into a lot of intersections so don't get lost. OR! you can use this easily mapped out routes.

8. At the end of passage is a room with blades in water below, hang drop into water timing your drop past blades. Swim down timing your swim past second blades through tunnel at bottom, come up to another room with more blades. Timing again past blades enter tunnel on left get air, pull lever flip around swim past blades to tunnel on right, enter head up to another room with blades get air. This room has 2 sets of blades, a set on each side of 2 platforms. In between the blades on the 2 platforms are ammo, timing your swim past the blades collect Desert Eagle clips on one platform and UZI clips on the other. Past one of the platforms is a tunnel, head through it hang right a little ways further pull lever on left swim through crevice on right then head right, at bottom collect MP5 clips, hang right back into room with 4 tunnels. Head back to left tunnel get air pull lever swim back to tunnel on right up through tunnel back in room with 2 sets of blades get air. This time swim past the blades through the tunnel on the other side of the other platform, surface in another room climb out on ledge. Straight ahead collect third Oceanic Mask, on right collect Life crystal pull lever opens gate in bottom tunnel in room with 4 tunnels. Return back in water swim back through tunnel past blades get air. Head through the tunnel on the other side to return back to room with 4 tunnels. Head through the bottom one, follow tunnel around to the right climb out at end to jump in water on other side of platform. Swim through tunnel to left then right, at end head straight up climb out on ledge pull lever. Drop down head left then left again back through gate, hang right to beam ray room to block that's facing gate of Water area, insert third Oceanic Mask block turns showing a statue. Head back up stairs back down walkway to walkway behind beam ray, enter through passage to Fire area.
9. At the end of passage enter a room with a bunch of pillars that will toast you in a minute. On the right climb up on block if you need help in crossing the pillars, there's a map up above it that is suppose to help you across. Straight ahead jump to pillar on left, run jump over first pillar to pillar against the wall, on right run jump grab to next pillar climb up. On right on higher pillar is a medi. pack, line up with the medi. pack run jump to pillar collect Lg. Medi. pack back flip back to pillar to avoid fire. When it's safe line up with edge of pillar, run jump to it immediately turn left run jump to ledge across, enter through passage. Drop down through trapdoor slide down slider, at bottom enter into another room.
10. In this room there are 6 fire breathing dragons breathing over 3 invisible pillars. Time your jumps to avoid being barbaraQed. Once the fire starts dying down stand jump grab pillar, when fire starts dying down again climb up run jump grab to next pillar, shimmy right to edge. When fire dies down again climb up turn right jump to ledge across, pull lever it stops the last 2 dragons from breathing fire. Return back to pillar shimmy right to edge, when fire dies down climb up turn right jump to ledge across, enter through gate to room with swinging pot of coals. Time your run past pot climb up on ledge or hang right to wall side step left to other side climb up on ledge, opens timed door on right collect fourth Oceanic Mask exit through door. Follow passage to gate on left enter through back to room with beam ray shoot Bees head to last block insert fourth and last Oceanic Mask in it's slot block turns to show statue. Head back to exit where you entered this whole mess. Climb back down ladder head back toward doorway, hang left to left corner doorway, straight ahead on right on ledge collect ULI Key. Head back to ladder climb up drop down on left straight ahead use ULI Key in lock, stops beam ray going through room. Head back to where beam was coming from drop down through hole slide down slider.
METEORITE CAVERN ANTARCTICA
1. In this level you meet up with Willard again, but this time he goes through some changes, he turns into
a Big Bad Spider. Notice the small platform that goes around in a circle, with 4 passages leading off
containing an artifact in each one. There's also hot coals all around, doesn't give you much room to play
around with the Spider. What you need to do is shoot the Spider run like crazy. When you stop to shoot
make sure you stop in front of a passage that contains an artifact, save the one in between the ladders for
last. When the Spider goes down sprint run to the end of passage collect the artifact sprint run back out
shoot again. The Spider doesn't stay down for long so you have to hurry. Repeat the same steps on the
other three passages, once you collect the last artifact continue to shoot the Spider till he dies. After he is
down and gone run jump grab to either ladder, climb up till you reach the ledge on left, shimmy left climb
up head through the passage in front of you.
2. Head left at the end turn left jump grab up to monkey swing. Head straight across to other end ( don't stop to look around or she won't move any further nor backwards ), at almost end drop down on ledge then run jump to ledge on right. Turn left at left edge run jump to ledge across, climb up to ledge above to an area with a box with an orange light on it. On left side of box enter through another passage then hang right, at the end as you exit out shoot two guards collect the first guards Lg. Medi. pack. As you approach the second guard shoot 3 more guards collect Desert Eagle clips from the second guard. On other side of gate push switch, opens gate in another area. Back on other side of gate head down the passage. At the other end head to the gate, wait for the helicopter to hover low then land, the gate will open enter through to aboard copter, watch the battle.